How To Build a Retro Gaming Machine With a Raspberry Pi
The main reason, in my opinion, why most people get hooked on this awesome hobby of retro gaming is because of the abundance of systems and games available for you to discover and enjoy. Add to this the number of platforms out there on which to experience the thrills and spills of retro gaming, and you have a hobby of almost limitless fun.
So, what if you want to create your own dedicated retro gaming machine, on which you can house all your favourite games and play them on all your favourite systems? What if you wanted to release yourself from the portable limitations associated with your PC or games console and pack all your retro games into a unit small enough to carry in your backpack? Well, in the following guide we will take you through all the ins and outs of building your very own dedicated retro gaming machine using the humble Raspberry Pi 3 or 4 and a nifty little front-end gaming management program called RetroPie.
The entire procedure to creating this awesome machine are fully explained in this guide, but let’s start by outlining the basic steps.
- Download RetroPie here onto your PC or Mac
- Extract RetroPie using your chosen extraction software
- Flash the extracted RetroPie files to a micro SD card
- Insert the micro SD card into your Raspberry Pi and start it up
- Configure your controller through RetroPie
- Connect your Raspberry Pi to your network
- Download any ROMs you would like to play
- Copy ROMs over to your Raspberry Pi.
- You’re ready to play!
Now let’s explore the setup process in greater detail.
What Do I Need To Build My Retro Games Machine?
Before you get started on your build it is best to make sure that you have all the necessary tools and items you need to complete the job. The list below will tell you everything you need to do this.
Raspberry Pi
To start with you’re going to need a computer on which to run your retro games. There are a number of options available, but in this case I’m going for the ever popular Raspberry Pi single board computer. The reason for this choice is because of the high power to physical size ratio of the Raspberry Pi along with the amazing level of support available out there. If you have any questions regarding your Raspberry Pi and retro gaming you can bet that the answer is only a Google search away.

There are several versions of the Raspberry Pi available, but for this project I would recommend either the Raspberry Pi 3b+ or the Raspberry Pi 4. The Raspberry Pi 4 is the most powerful Pi on the market right now, but at the time of writing there is not a full released version of RetroPie available for it (the Raspberry Pi 4 version of RetroPie is currently at the beta stage). For the purposes of this tutorial I will be using the Raspberry Pi 4, as the version of RetroPie available for this model is only going to get better with time and is also considered to be pretty stable. If you have a Raspberry Pi 3b+ this is still a very capable machine and perfectly acceptable for the job in hand. Also the setup steps for both machines are pretty much identical so you should have no problems following this guide for either one. Rest assured I will try to mention any differences as we go.
Micro SD Card
You will need a micro SD card to store RetroPie on as well as the ROMs you want to play. It is up to you what size micro SD card you use, however I would recommend at least 16GB.
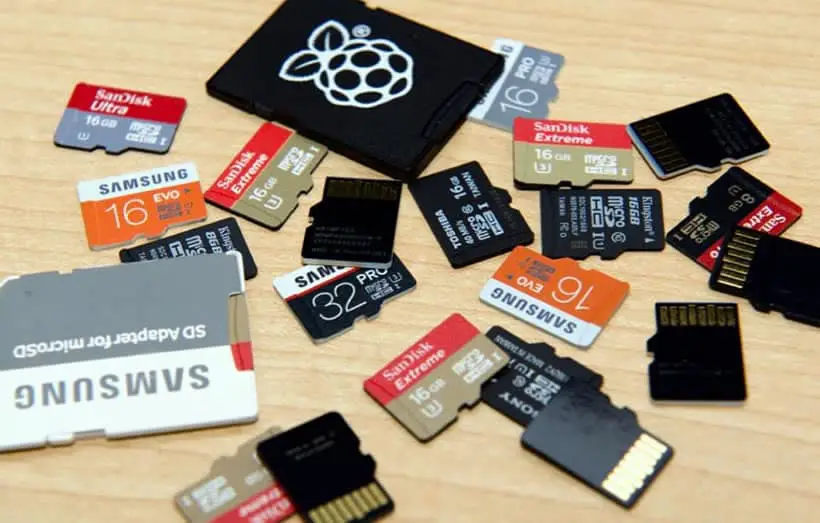
In the past it has been recommended not to use a micro SD card larger than 32GB due to the formats applied to larger cards, however I have tried booting from a 128GB sized card and had no issues, so the choice is up to you. Of course if you intend to store a lot of ROMs on your micro SD card (especially those of disc based systems such as the Mega CD or the Playstation One) then I would seriously recommend that you go with a larger micro SD card such as 128GB or even a 256GB model. If you need some help deciding which one to go for I have compiled a list of recommended storage devices here.
Power supply
It may surprise many of you, but being the budget machine that the Raspberry Pi is, when you purchase the board on its own it does not come packaged with a power supply. Cheap compatible power supplies are readily available at many electronics stores and websites such as Amazon. All you need is a power supply with an output of roughly 5 volts 3 amps.
If you choose to purchase a power supply separately make sure the one you select has the right connector for the Raspberry Pi version you are using. The power supply for a Raspberry Pi 4 needs a USB type C connector whereas one for a Raspberry Pi 3b+ (and earlier versions) requires a micro USB connector.
Raspberry Pi Case
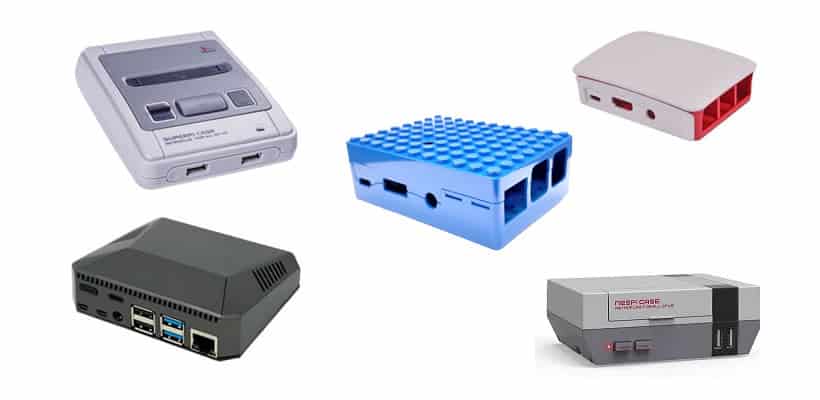
Being a budget machine, the Raspberry Pi comes delivered as a bare bones circuit board with a few microchips and connectivity ports added to it. If you’re serious about keeping your new retro games machine for the long term, then it would be wise to invest in a case for it.
A case will add essential protection to the inner workings of your machine as well as provide it with a snazzy style of your choosing. There are many different Raspberry Pi cases available, some of my favourites are listed here. Depending on the case you choose, it may also add some cool extra functions to your machine. The choices are numerous and the choice is yours.
HDMI Cable
This may seem like a bit of a no brainer, but I wanted to make sure I included everything so that there are no grey areas to stumble over. The Raspberry Pi SBC connects to a display through it’s HDMI port, so you will obviously need an HDMI lead. As with the power supply connector, the HDMI port on the Raspberry Pi 3b+ differs slightly to that of the Raspberry Pi 4. The Pi 3 comes fitted with a regular size HDMI port whereas the Pi 4 has a micro HDMI port installed.
It is entirely possible that you have things like a micro SD card, an HDMI lead and/or a power supply dotted around the house collecting dust. If this is the case an all in one package may not be the best option for you. However if you are in need of all the items above your best option would most likely be to buy an all in one bundle.
These packages include all the above mentioned items and occasionally a few added extras such as passive and active heat sinks as well as micro HDMI to HDMI cables.
RetroPie Image
In order to manage your ROMs and launch the emulators that play them you will need some management software. There are many different applications available such as Recalbox and Hyperspin, but for this project I am going to use RetroPie.
RetroPie is a retro games management application that combines the functionality of RetroArch with the usability of Emulation Station so is perfectly suited to our needs. It also loads as soon as the Raspberry Pi boots up meaning there’s no faffing about waiting for the operating system to finish setting up before you have to manually run your desired application. The whole process is seamless. As well as this, RetroPie has been optimised specifically for the Raspberry Pi allowing it to run with lower overheads leaving more power available to run your games.
Controller
Obviously in order to interact with RetroPie and your games you will need a controller. Depending on the type of games you decide to play, the type of controller you select for your retro gaming experience may be more of an important choice than you realise.
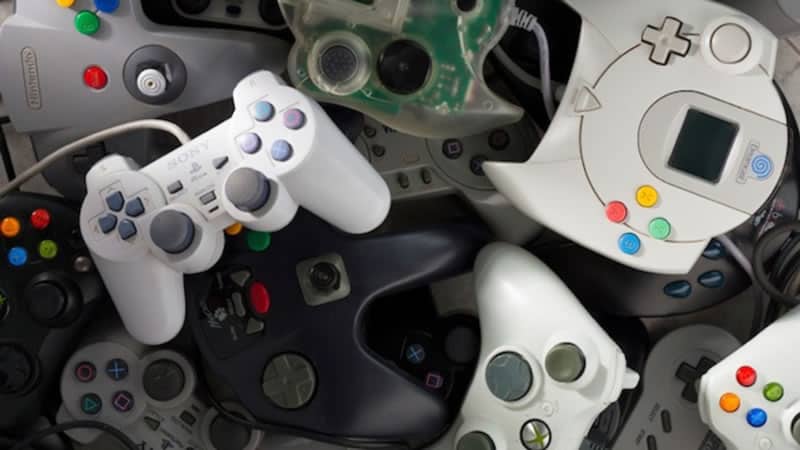
Generally, every system, be it a Megadrive, 3DO, N64 or any of the other gaming machines out there, has a controller that is optimised to their gaming experience. On the other hand there are a number of controllers that manage to bridge the gap between systems allowing you to enjoy the games from multiple machines without losing any of the intended experience. There are many different controllers out there to choose from so the choice is not necessarily an easy one. If you’re having trouble deciding click here for a list of my favourite retro gaming controllers.
ROMs
Once you have completed setting up your retro gaming machine you’re going to need some games to play on it. This is the point where you need to get hold of any gaming ROMs that take your fancy. We will be taking you through where you can acquire these and how to install them later in this guide.
Other Items
Other things you will need are a PC or Mac to download the necessary software. On your computer you will also need to make sure you have some extraction software such as WinRAR or 7-Zip and some imaging software like Etcher so that you can burn RetroPie to your micro SD card.
It is also likely that you will need a spare keyboard, for use with the Raspberry Pi, for entering things like WiFi passwords and for navigating through the back-end menus.
Download and Install RetroPie
Downloading and installing RetroPie on your Raspberry Pi is a pretty simple procedure. The process is virtually identical for either the Pi 3b+ or Pi 4 so there shouldn’t be any confusion.
First off you need to download RetroPie from the RetroPie website on to your computer. On the download screen you are presented with a number of download buttons. Make sure you click the button that corresponds to the version of Raspberry Pi that you have. I have clicked on the Raspberry Pi 4 button, but if you have a Raspberry Pi 3b+ you should click on the Raspberry Pi 2/3 button.
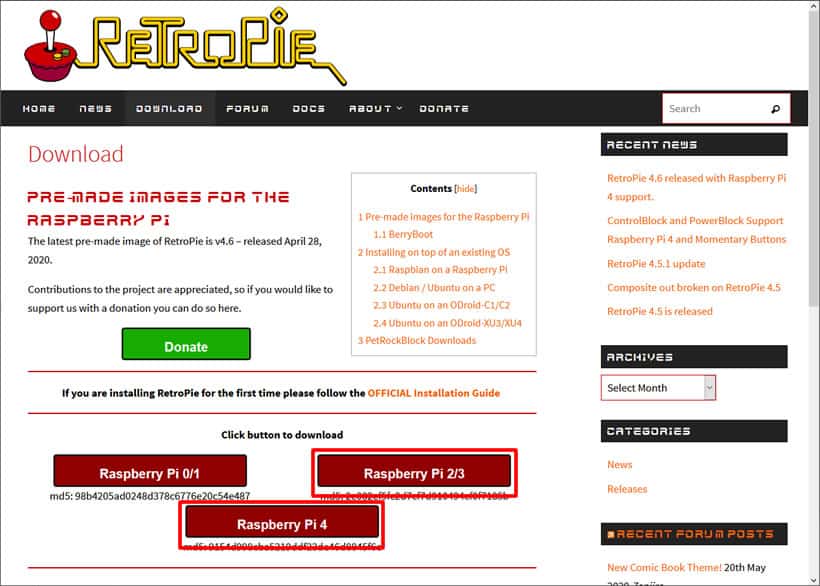
Depending on your internet speed RetroPie will take a number of minutes to download. Once the download has completed you are ready to extract the files and then burn them to your micro SD card.
Using Windows Explorer on a PC, or Finder on a Mac, navigate to where you downloaded the RetroPie files to. By default this would normally be the Downloads folder. Once there use your chosen extraction software to unzip the RetroPie files to a selected folder. The screenshot below shows the process using WinRAR.
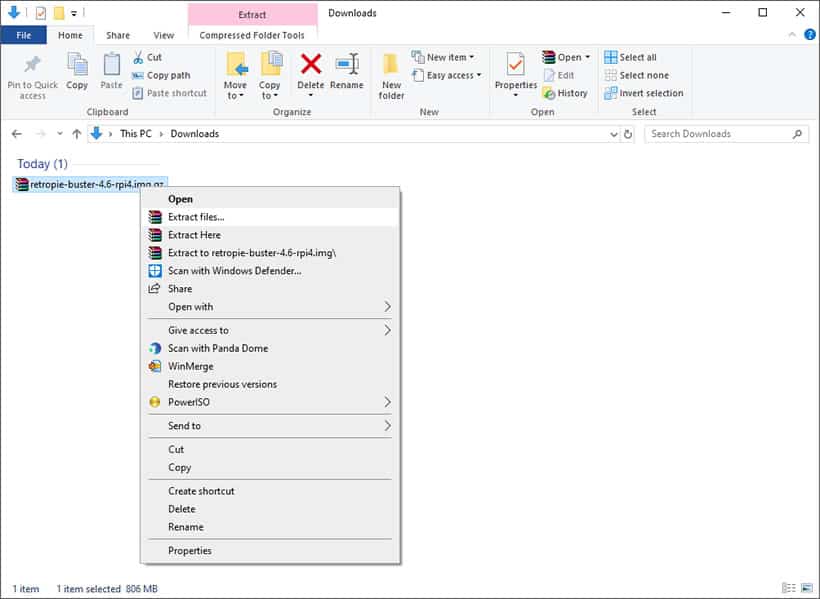
It is up to you where you extract the RetroPie files to. I generally extract the files to my desktop. That way they are easy to locate when you are ready to burn them to your micro SD card and once you are done with this you can simply delete the extracted files.
Now that your files have been extracted they are ready to be burned to your micro SD card. For this we will be using the Etcher application as it’s quick and easy to use and is compatible with both PC and Mac. Once you have Etcher installed and running click the ‘Flash from file’ button and select the extracted RetroPie file. Next click on Select target and select the drive you want to burn the RetroPie image to.
I strongly recommend you double check that you have selected the correct drive that you want to burn your files to. Once the flashing process has been started it will delete whatever was previously on that drive and there will be no way to recover it.
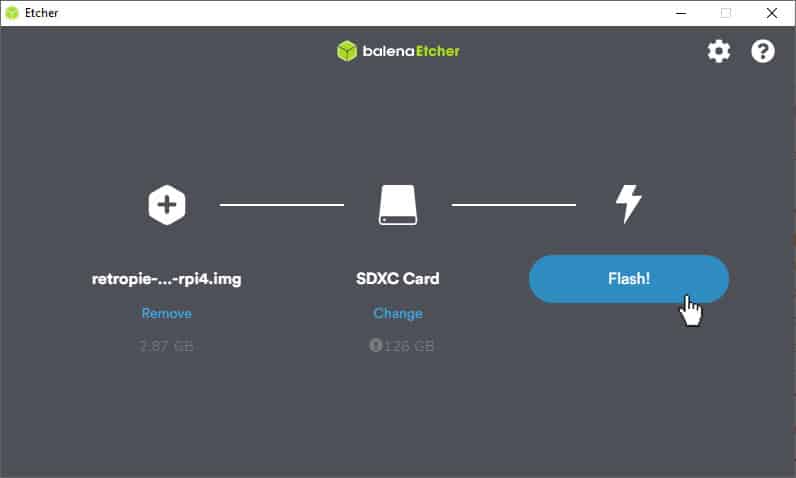
When you are sure that you have selected the right drive simply click the ‘Flash!’ button and let Etcher take the reigns. It will take a few minutes but when the process is complete you will be ready to start up your Raspberry Pi.
Connecting and Starting Up Your Raspberry Pi
Now that you have RetroPie burnt onto your micro SD card you are ready to boot up your Raspberry Pi. Insert the micro SD card into the Pi then connect up all the other leads (HDMI cable, controller and keyboard).
If you are connecting up a Raspberry Pi 4 you will notice that there are in fact 2 mini HDMI ports to allow for dual screens. The primary mini HDMI port is the one closest to the USB-C power port, so make sure that you are using this one and not the other as doing so could cause display issues.
The last thing you should connect up is the power supply as the Raspberry Pi will boot up as soon as this is connected… There is no on/off switch on this budget machine. During the boot up process your display should show numerous lines of code followed by the RetroPie logo in all its glory.
Depending on the type of display you’re using you may encounter an issue as I did. Basically, upon booting up my Raspberry Pi, instead of being presented with the RetroPie logo splash screen all I could see was a blank screen. After some in depth investigating I discovered that the issue was down to my aging Sony TV and in order to fix it I needed to make some amendments to the Raspberry Pi config file. I struggled to find much documentation on this issue so I decided to write a blog about it. Click here if you are experiencing a similar issue, it may help you work out the problem.
Setup Your Controller In RetroPie
Normally when you load up RetroPie the first thing you see is the main menu screen, however if this is the first time you are running RetroPie on your machine then you will instead be presented with a popup screen which will guide you through the controller configuration procedure.
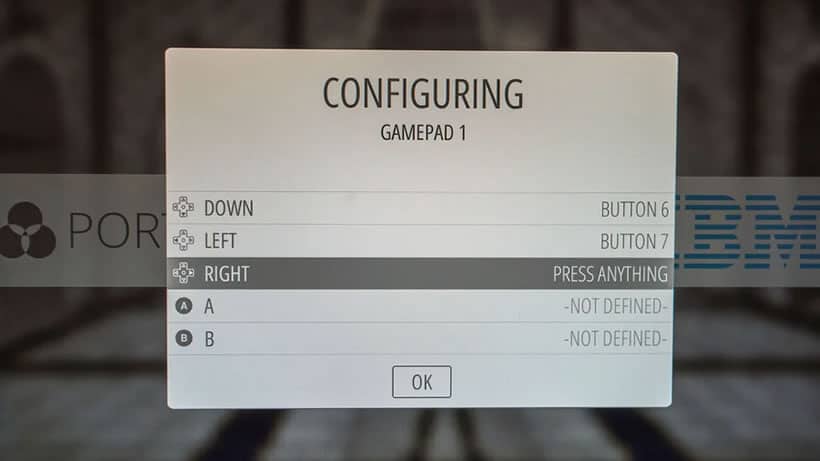
This is a very simple process which should only take a few seconds. Simply follow the on screen instructions in order to map the desired button on your controller to a desired function. Depending on which controller you are using you will more than likely find that RetroPie asks to map buttons that don’t exist on your controller. For example RetroPie may ask you to configure a button to represent moving the left analogue stick up, when your controller doesn’t have any analogue sticks. If this is the case just hold down any button for a few seconds in order to skip that function. If you make any mistakes during the controller configuration process, don’t worry. Once you have reached the end of the procedure you can scroll up to any individual button to remap it.
Note that these controls are for navigating through the RetroPie menus and not necessarily for the actual games. You are able to configure your gaming controls independently to RetroPie.
The final function that RetroPie will ask you to assign will be that of the hotkey. The hotkey, when used in conjunction with other specific buttons will perform a function within the emulator you’re currently using. For example, pressing the hotkey and button x simultaneously will bring up the RetroArch GUI menu, where you can perform tasks like save and load states, add shaders and many, many more.
I generally assign the hotkey to my select button, as it’s a button that isn’t used all that often, and that has worked well for me over the years.
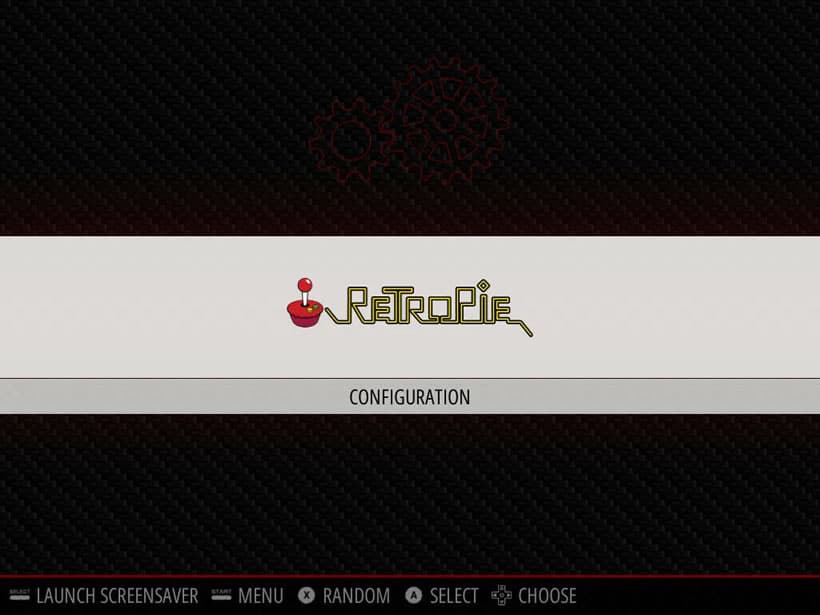
Once all buttons have been mapped RetroPie will finish loading and you will arrive at the main menu screen.
Download and Install Your ROMs
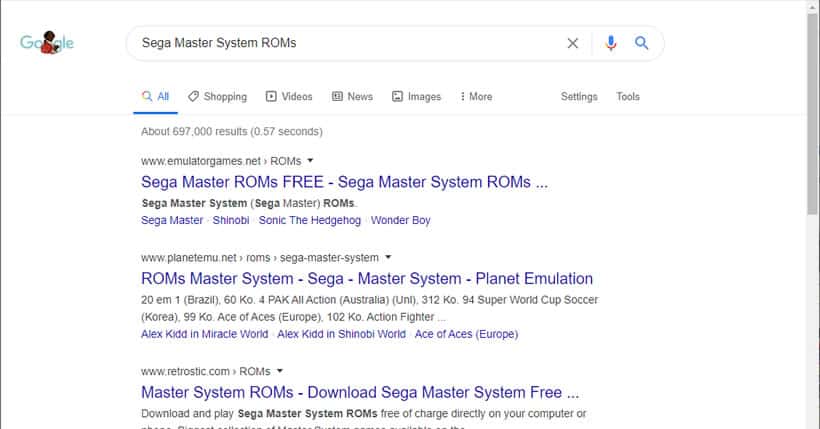
Now it is time to get into some of the exciting stuff; getting hold of those wonderful games. There are plenty of resources for ROMs all over the internet. All you need to do is perform a Google search of ROMs for a particular system and you will be on your way. Let’s say you wanted to get hold of some Sega Master System games. Just search for ‘Sega Master System ROMs’ in Google and you will be presented with a number of websites that can fulfill your needs. It’s likely that these websites will also have ROMs available for many other systems as well.
One favourite site of mine is Vimm’s Lair. This awesome site gives you access to thousands of console ROMs which can be easily downloaded on an individual basis. I have downloaded many ROMs from this site in the past and never had any issues.
Alternatively, if you’re looking to download a bulk of games rather than just one at a time the best option is to do this using torrent software like uTorrent. Using this method you can get hold of entire back catalogues of games for most systems. Again this starts off with a simple Google search for your preferred system’s romset. Using the Master System example again your search would be something like, ‘Sega Master System romset’. From there you will likely find multiple sources for even the most obscure of systems.
Download the torrent file and then use your torrent software to acquire the ROMs. In many cases there will be a huge number of files to download so be prepared to wait several days before the download has completed.
Now that you have the ROM files on your computer all you need to do now is transfer them to your Raspberry Pi so that they can be accessed by RetroPie. The best way to do this is to connect to the Pi over the network. This can easily be done by following the steps below
The best way to transfer your ROM files from the computer to your Raspberry Pi would be to connect to the Pi over the network. To do this you will need to follow the steps below:
- Set the WiFi country
- Connect the Raspberry Pi to WiFi
- Connect your computer to the Raspberry Pi over the network
- Copy and paste you ROM files from your computer to the Raspberry Pi
Everyone loves WiFi, but if you have the option to go for a wired internet connection this can remove the hassle of the first two steps. Simply connect your Pi up using an ethernet wire and you can jump straight to step 3.
Set the WiFi Country
In order to connect to WiFi you first need to specify your country. To do this in RetroPie, navigate to the RetroPie configuration menu (if you haven’t installed any ROMs yet this will be the only menu option in RetroPie) and select Raspi-config. From there you will be transferred to the back-end of RetroPie. This can look quite intimidating at first as there are a number of options which aren’t the easiest to understand. Don’t worry, the procedure here is very simple. Select option 4. Localisation options, then select option 3. Change Wi-fi Country. In the next menu simply select the country you are in and you’re done for this step.
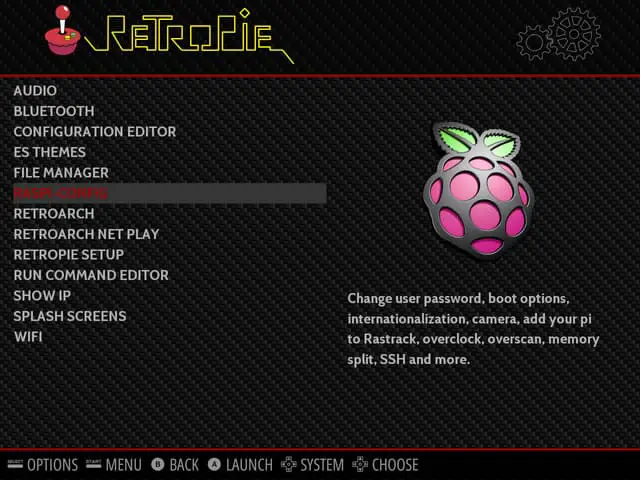
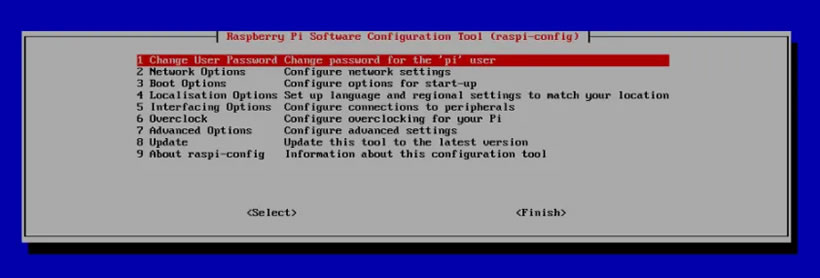
Navigating through the back-end menus of RetroPie using a controller can be a bit tiresome. For more rapid scrolling and generally better ease of use it is best to use a keyboard.
Connect the Raspberry Pi to WiFi
Now that you have selected your country you are ready to connect to the WiFi. Again in the RetroPie configuration menu select WiFi and then option 1. Connect to WiFi network. Next select the WiFi network you want to connect to and then use the keyboard to enter the password. Simple as that.
Connect to the Raspberry Pi Through Your Computer
You are now ready to connect to your Raspberry Pi through the computer. To do this you will need to know your Raspberry Pi’s IP address. In the RetroPie configuration menu select the Show IP menu item. The resulting screen will tell you the IP address which will resemble four numbers separated by periods e.g. ‘0.0.0.0’. Make a note of this as you will need it later.
Now move over to your computer and open File Explorer (or Finder if you have a Mac). In the address bar at the top type in \\ followed by the IP address of your Raspberry Pi. At this point you may be asked to enter a user name and password for your Raspberry Pi. By default the username is pi and the password is raspberry. You should now have access to the roms folder on your Raspberry Pi.
Open the ROMs folder and from there copy and paste any ROMs that you have into the ROMs associated system folder. I will copy my Sega Master System ROMs into the mastersystem folder.
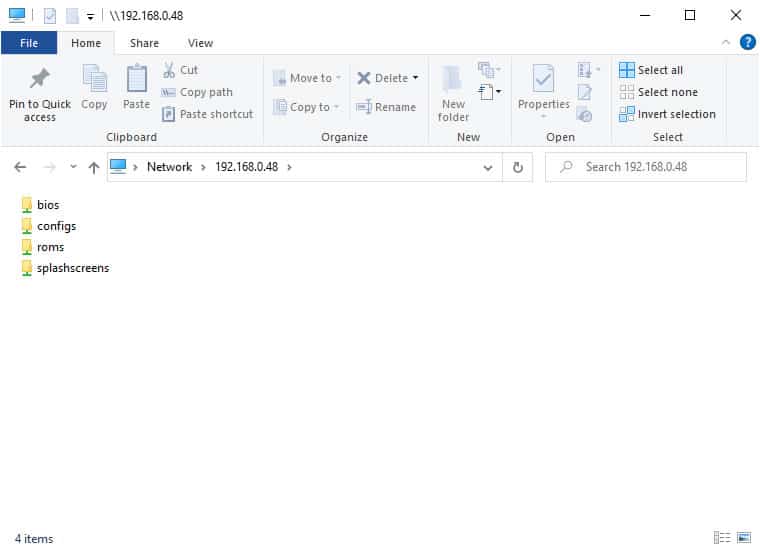
Once the copying and pasting process has been completed you should be ready to go. Disconnect from your computer, move back over to your Raspberry Pi and restart it by hitting the start button on the controller and then selecting Quit and Restart System. Upon restart you will see a few more menu items in the RetroPie home screen consisting of all the systems of the ROMs you imported.
Play Your Retro Games
Congratulations! The moment has finally arrived. RetroPie is set up, your ROMs are installed, your awesome retro gaming machine is now ready for you to take it for a spin!
First use the left and right buttons on your controller to highlight which system you would like to play first and press the A button to select. You will then be presented with the list of games available for that system. Now use the up and down buttons to highlight the desired game, press A to select and you’re away. If you decide you want to play a different system simply press B to move back to the main menu.
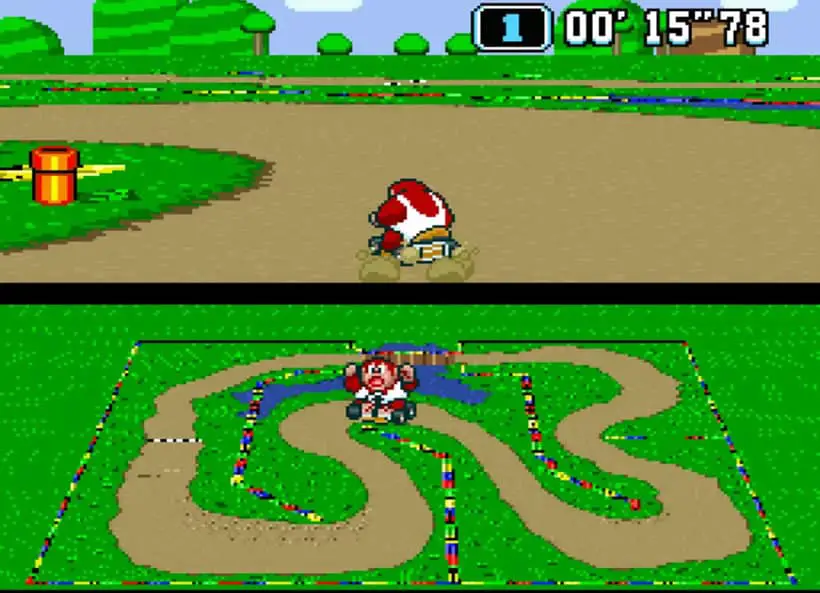
What now awaits you is hours of nostalgia fueled fun playing all those games that kept you awake into the early hours when you were young. Enjoy yourself, you deserve it!
