
How To Install A Passive Heat Sink On A Raspberry Pi
When it comes to portable retro gaming, the Raspberry Pi is the go to system for playing all your most loved games from by gone years. This little device allows you to experience a whole range of retro consoles and machines, while still granting you the luxury and flexibility of being able to fit in your pocket and take it anywhere you go.
There is however, a limit to the types of systems the raspberry Pi can emulate, and the main reason behind this limitation is the power of the CPU. One way to reduce this limitation is to increase the speed of the CPU by overclocking, unfortunately a side effect of this is the CPU can increase in temperature to the extent that damage may occur.
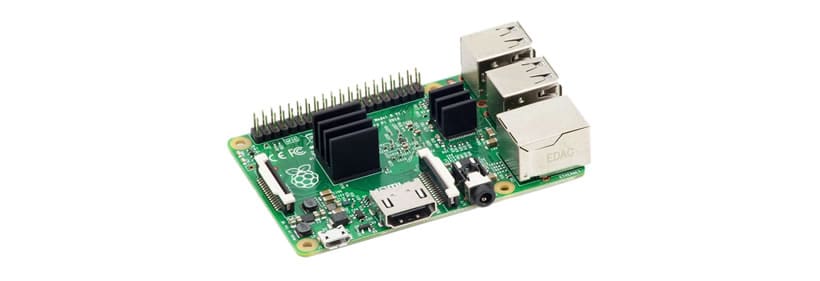
So, how do we reduce this risk? By installing a heat sink on the Raspberry Pi CPU and any other chips that are at risk of overheating.
The basic steps of installing a passive heat sink are as follows –
- Select the chip to install your heat sink on.
- Select an appropriate material, size and form of passive heat sink.
- Remove the adhesive backing from the bottom of the heat sink.
- Place the heat sink on top of the selected chip.
- Apply light pressure to the heat sink to make sure it is securely fixed to the chip.
Let’s go through these steps in greater detail
Select the Chip to Install Your Heat Sink On
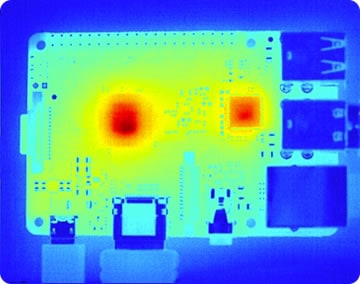
Where do you need to install your heat sink to? The basic answer to this is any chip that is at risk of overheating. In the case of the Raspberry Pi (and all single board computers for that matter) this would primarily be the CPU chip. You may also want to consider the network interface card (NIC) however this does not tend to heat up too much when the Raspberry Pi is used simply for retro gaming.

Installation of a heat sink in practically the same for each version of the Raspberry Pi bar the location of the CPU. The image above shows where you can find the CPU on each model.
Select An Appropriate Material, Size and Form of Heat Sink
There are a number of factors that contribute to the efficiency of the heat sink you install including type of material, size and surface area. We will look at each of these considerations below –
Heat sink material – Heat sinks generally come as either copper or aluminium. Copper possesses superior cooling qualities to aluminium as it is a better conductor of heat, however they generally have a lower surface area as they do not have fins or pins. This is because it is more difficult to forge such forms, As a result copper heat sinks are generally smaller and therefore better suited if the available space for the heat sink is limited.
Heat sink size – Size should definitely be a consideration when it comes to choosing your heat sink. The rule is a larger heat sink which is the same form and material as a smaller heat sink will dissipate more heat. Obviously you are limited here by the amount of space available to you.
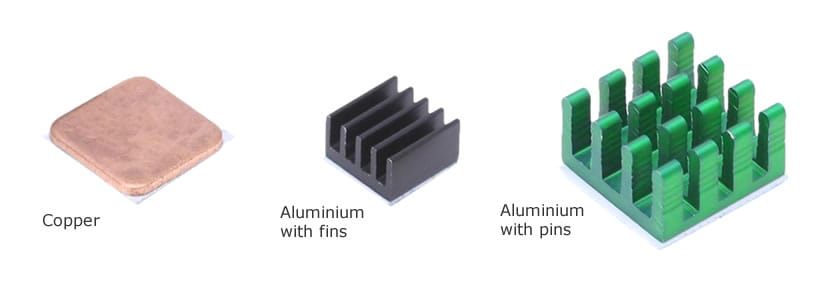
Heat sink form – This would most likely be the main consideration when selecting a heat sink. When we say form we are referring to the shape of the heat sink. How many fins or pins does it have? How tall are these fins or pins? The answers to these questions will dictate what the surface area of the heat sink is. The greater the number/size of the fins, the larger the surface area. Also, if the fins are split up to form pins this will add to it efficiency as more turbulence will be created by any air passing through the sink, thus allowing more heat to be drawn away from the CPU.
Remove the Adhesive Backing from the Bottom of the Heat Sink.
This step is pretty self explanatory. Most heat sinks that are made for the Raspberry Pi come with a thermal adhesive layer already fitted to the bottom of the sink. If your heat sink does not have one of these you can buy thermal adhesive strips separately and cut them to the appropriate size.
Simply peel off the protective covering layer from the bottom of the heat sink and it is ready to be installed to the Raspberry Pi.
Place the Heat Sink On Top of the Chosen Chip
Another self explanatory step. The only thing you need to consider here is that you apply the heat sink at the same orientation as the chip. That is to say, make sure the sink is at the same angle as the chip so that maximum contact is achieved which will allow for maximum efficiency.
Apply Light Pressure To The Heat Sink
Finally, to make sure the heat sink has been fixed securely to the chip, apply light downward pressure to the heat sink for a few seconds. Obviously, be sure not to press too hard as excess force may cause damage to the Raspberry Pi.
Why Would I Need To Install a Heat Sink?
As mentioned earlier, there is a limit to the type of system that the Raspberry Pi can emulate. While you will have few issues running systems like the Megadrive and GameBoy Advanced on the Pi it does begin to struggle when it comes to reproducing the performances of the N64 and the Sega Dreamcast. To be honest, trying to play such systems on a Raspberry Pi running at normal speed is basically not possible, but there is another option. Overclocking the Raspberry Pi’s CPU so that it runs faster than originally intended will allow for better performance and therefore make the possibility of running some of the more powerful systems more likely.
One issue that is caused by overclocking is that it can cause the CPU to overheat. Once the CPU heats up to over 85 degrees it becomes less efficient and starts to run slower. If the CPU heats up higher still, then there is a significant possibility that irreparable damage may occur. It is therefore recommended that you install a heat sink if you intend to overclock the CPU.
Are There Any Alternatives To Installing A Heat Sink?
When it comes to keeping your machine cool there are a number of options available to you. Some of these are more effective than a heat sink, but it is the ease of installation that makes the heat sink the preferred choice in my opinion.
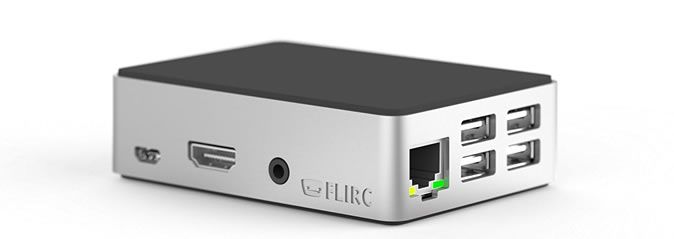
Case with built in heat sink – If you plan to invest in a case for your Raspberry Pi, you could do a lot worse than considering one that incorporates a heat sink into its actual structure. The Flirc case for example is made primarily from aluminium and thus provides the benefits of a heat sink without actually having to install one. The only drawback on this option is the cost as the Flirc case costs quite a bit more than stand alone heat sinks. You can pick one up here
Cooling Fan – Installing a fan as the cooling system for your Raspberry Pi is a very viable option. While it’s efficiency can be argued it will provide a more effective cooling system for your machine, so if you plan on pushing your Raspberry Pi to the limits this may be the option for you. Drawbacks are however quite numerous. Not only is the installation procedure more arduous, you will also be compromising on space and taking up some of the GPIO pins on the Pi which you may want to devote to other functions. You can pick up a compatible fan here.

Liquid cooled – Ok, so it is unlikely that you would go for this option, but it is an option nonetheless. This setup is incredibly effective, but to be honest if you’re thinking of going down this road to keep your Raspberry Pi cool, I would suggest that you invest in a more powerful single board computer instead as doing so would be less of a headache.
Can I Check the Temperature of The Raspberry Pi CPU?
So, how do you know if the CPU is getting too hot. In this case, a touch test is not recommended as 85 degrees will likely cause discomfort and will probably result in minor burns. Thankfully there is another way even if you’re running RetroPie. Simply follow the steps below to find out the current temperature of your CPU.
- Connect to your Raspberry Pi through SSH. If you’re not sure how to do this we have a neat little guide here.
- Enter the command below and press enter.
- The temperature will be displayed on the next line.
/opt/vc/bin/vcgencmd measure_temp
Related Questions
What is a heat sink? – This is a device that assists in keeping a component of your machine cool, generally a CPU or another active chip. Passive heat sinks such as the ones we are discussing in this article work by conducting heat away from the chip and dispersing it as efficiently as possible.
Are there any drawbacks to overclocking? – Aside from the significant increase in temperature mentioned earlier, overclocking the Raspberry Pi CPU will also invalidate the warranty. Overclocking in moderation is not necessarily a bad thing, but you should make sure you are prepared for it and have explored any other avenues first.
Does the Raspberry Pi need a heat sink? – Absolutely not! The Raspberry Pi was designed to run without a heat sink or fan and will reduce its CPU speed if it gets too hot (clock speed throttling). The only circumstances where a heat sink may be needed are when the CPU is overclocked or the Pi is stored in a hot unventilated environment.
